Thursday, April 30, 2015

The Bathroom Is Done!


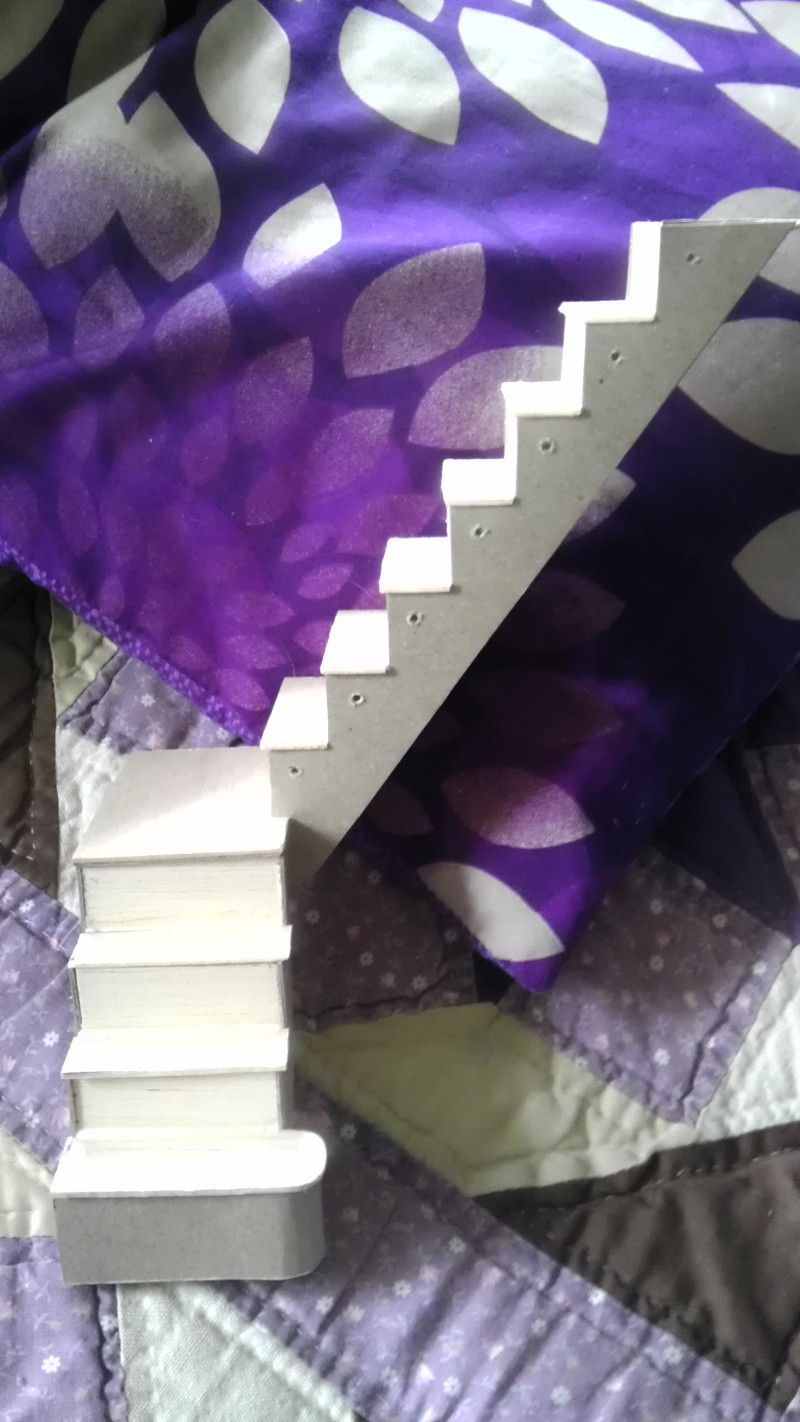
The bathroom doesn't have any woodwork around the floor edges because it is mostly all tile. All the bathroom fixtures have been given a coat of gloss white paint to simulate porcelain.


I will add all the little details and decorations later after I get the room walls, floors and ceilings done.


There will be a little chair, table and drying rack in the bathroom when the furniture gets made. I'll probably make a better shower curtain too.

Now, we go up to the nursery.

Wednesday, April 29, 2015

Bathroom Light Fixture


The light bulb was installed prior to the fixture being made so I worked around the bulb instead of running my wiring through the fixture. The bulb just lays in the fixture and comes out easily for changing it.


I used my teaspoon again to form polymer coils around it. I wanted some open work (like filigree) to make some glossy accents clear spots for the light to shine through. I wanted it to look like vines. Anyway, I didn't have the right materials to make one like is in the book. I might change it out later if I decide I don't like it or add more to it but for now, it works.


Monday, April 27, 2015

The Bathroom Toilet


I took one of the bowls I made by forming paper clay over a tsp measuring spoon and added 2 thicknesses of foam core to make the shape of the bottom of the toilet. I carved out a curve in the top to glue the bowl to.

Then I filled in the sides and added paper clay to the foam core to make the shape.


I glued two thicknesses of cereal box cardboard together with the hinge in between on the seat and lid. I made the hinge with aluminum tape and a piece of wire. I added a roll of paper clay around the seat and smoothed it out to give it a little padding.

I just painted the lid and seat. I added a little back piece to the toilet to hold the hinge in place so the lid and seat could be raised.


I used glossy accents to add "water" to the bowl. After it dried I added a little more to top off the water level.

I made the water tank out of balsa and added a wooden dowel "pipe" down to the back of the toilet. I made the water inlet to the tank from florist wire. It goes all the way down to the floor.

Bathroom fixtures... not that hard to make! All the bathroom fixtures will be permanently attached to the floor and walls when they are done.

Sunday, April 26, 2015

The Bathroom Sink


I made two bowls for the bathroom. One for the sink and one for the toilet. I formed them out of paper clay over a teaspoon measuring spoon. I used one of the bowls to make the sink. I also used two straws and a rivet for the drain.


I cut the top and back of the sink out of foam core. Then I cut a hole for the sink to fit in. I finished it all with paper clay.


When it was dry I lightly sanded and painted the sink with white gloss paint.

To make the pipes, I just bent the straws and filled them with vinyl spackling. The bend is used to simulate elbow joints. I ran the water pipes up to the faucets all made of florist's wire.

When the "pipes" were dry, I painted them with silver alcohol paints. I added little faucets and I added a little drain plug, then fastened it on with a chain.


Thursday, April 23, 2015

Making the Bathtub


I made a pattern for my bathtub out of cereal box cardboard. I think I can probably make just about anything out of paper clay and cardboard. I plan on making the plumbing fixtures out of wire and jewelry bits. My tub has claw feet. I started with drawing out the size and shape of the tub and cutting it out of cereal boxes.


The bottom of the tub is more curved at the back so I had to cut my cardboard at an angle on the curve. Yeah, I could just buy one but I want to make as much as I can from scratch on this one since I don't have a time limit and I learn best by just jumping in and doing things. Around my house we call that "doing it the Theresa way".


***There's a pattern on the pattern page if you want to try and make one yourself.***


After I got the shape I liked for the tub, I covered it inside first with paper clay and smoothed it out with a wet finger. I used the oven set on 220 degrees to speed the drying time. Then I covered the outside of the tub and dried it too.


When all the paperclay inside and out was dry, I glued the tub edge to it and put a rim of paper clay under the edge all around and smoothed it out.


Once that was dry, I put a rounded top to the rim with paper clay by rolling out the clay and smoothing it down over the edges of the rim, inside and out.


While the rim was drying, I punched a little hole in the bottom of the tub and made a drain by gluing a rivet into it.


To make the claw feet on the tub, I glued 1cm round beads to the bottom of the tub. Then I used paper clay and a Mod Podge mold to press out the chevron for each foot. I wrapped the larger part of the chevron around the bead and stuck the shorter top to the tub. I let it dry overnight.

In the morning, I took a brush and ran a layer of glue over each foot and around the back to make sure the "claws" would stick well to the tub and the beads. I let that dry real good before I painted them silver.


Then I made a little faucet and handles out of florist's wire  (about 5.5 inches long before bending) and then painted it silver too. I used glossy accents to fill in some bulk around the handle parts and the space between the wires to make the faucet look like one solid piece.


When the layers of glossy accents on the handles were built up enough to look like ceramic knobs, I painted them white. Then I added a length of wire for the shower pipe and glued a rivet to the end for a shower head and glued that on to the back of the faucet pipes.


I used a filigree jewelry fitting to make the overflow drain and attached a little chain to it to connect the drain plug.


I love that little drain plug!! I still remember the v-chain attaching the drain plug to my grandma's old tub when I was a little kid. How many people can remember what a v-chain was?

I punched out 4 holes of cardboard and glued them together, then ran a pin through a small bead and then through all the layers of holes with a drop of glue on each layer. I made a eye hook on the end of the pin and attached it to the chain. Then I painted the plug white.

I think that the tub is finished except for maybe a soap holder and a rubber ducky! It turned out so cute, I'm glad I didn't buy one after all. It's more fun to make one!


Tuesday, April 21, 2015

Bathroom Tiles and Bricks


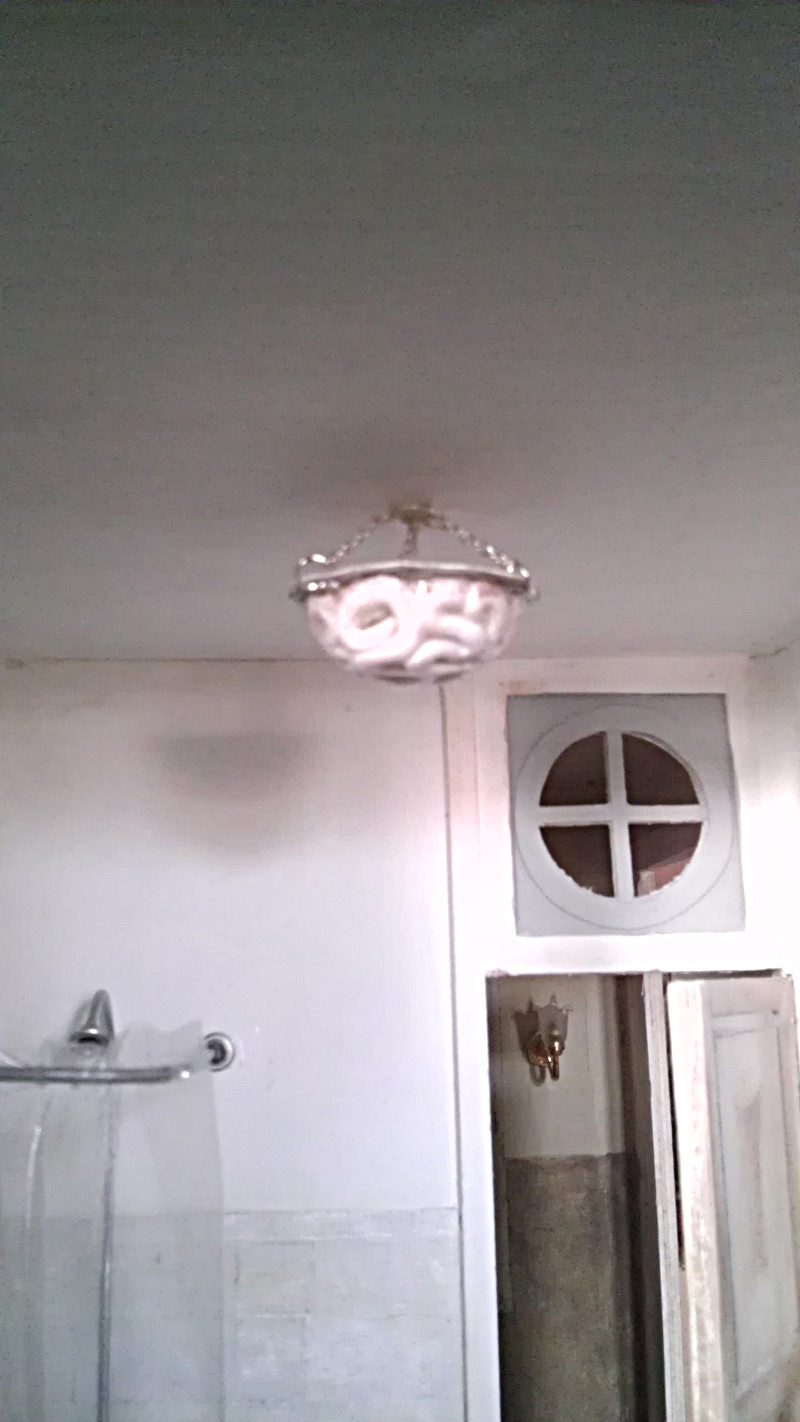
On the bathroom side of the partition, there are tiles that go half way up the wall. There are a lot of tiles in the bathroom. The ventilation window was cut out over the door with a hole saw. The walls in the bathroom are painted wicker white and the tiles came out a little grey and they will get a coat of pearl acrylic. I made my own tiling but they make dollhouse tile if you want to save some time.


The tub side wall has tile all over it but I just made tile to go down half the wall. I'm going to paint the other half of that wall. The opposite wall gets a faux brick look from scored foam core.


I wanted to use a stencil with spackling or gel medium over it but I could not find a small enough stencil in any of the craft stores near me so I used an old model train trick. I scored foam core board with an exacto and then scored the cut lines with a ball tipped tool. It makes the paper look folded inward on the lines to look like bricks. It doesn't have the rough brick texture I wanted but it works. Then I painted it all gloss white.


I also made the bathroom floor tiles cut out of cereal box cardboard. I wanted something to warm the room up a little. Too much white and grey for me. The fixtures will all be white too so... I painted these a warm butter nut color and smeared my grout all over them being careful not to wipe too much off so it would look like marble. Anyway, that's the look I was going for.


Friday, April 17, 2015

The Landing Is Done!


The landing is done! YIPPEE! I've already started working on all the bathroom tiles but before I get ahead of myself... the landing is done and I love the steps and rails even though they were very intense. My step does hang over the door a little more than the one in the book. And my steps are a little crooked but I can fix that later. It's not perfect.


The view from the bathroom into the landing doesn't show much but you can really see it best from the window. It was a lot of work but it's the most interesting part of the house architecturally speaking.


I'm not going to tell you the stairs are easy. They take a lot of patience. Just don't give up until they look right. That railing was a pain in the wazoo but eventually with much finagling (and groans of frustration) it came around to my way of thinking... sort of. I still have to straighten a few rungs. :)


The measurements in the book are pretty exact so I need to make a few adjustments like straightening up my top rungs. You can't see them from any angle. I stuck my camera in the living room to get this shot. You will be an expert measurer and rung fixer by the time you finish the landing!


Tuesday, April 14, 2015

Upper Floor Stairs


The stairs to the upper floor are divided. I think that adds a lot of interest to the landing. I cut the frames out of two thicknesses of cereal box cardboard and then glued balsa risers and steps onto that, just like the big staircase only different measurements.


They fit together perfectly. The underside joints are reinforced with thick glue for added strength, then the whole thing (except for the wooden parts) is coated with gesso before painting white. 


The steps are stained with a burnt umber wash. The rail is cut out of one piece of card double thickness. I will cut it as needed for making the top floors railing to get it all to fit and look right.


The steps are all dried and ready to fit into the landing hall.

Sunday, April 12, 2015

Working On The Landing


Oh no, more steps! Actually before the steps going to the third floor get made, the landing needs to be painted and the floor made. The walls are two toned beige and tan.

After I painted, attached the lamp and glued in the far wall from foam core board, I used vinyl patch to fill in the edges like you would caulk. I put vinyl spackling into an empty glue bottle, added a tiny bit of distilled water to thin it out a little and used it to fill in the cracks between the wall edges for a nice finished look. I smoothed it out with my finger just like real caulk. After it was dry, I painted over it.


The floor is done just like the entry floor only a little smaller pattern. I have to get the landing done before I can put the wall up between it and the bathroom so I needed to do the hallway living room wall and woodwork too before I put the bathroom wall up. I'm doing a white brickwork wall there and down the sink side of the bathroom. Once I get the divider up, it will not be easy to access the landing except through the double doors or bathroom door... or the window before I glue it in.


The railing on the second story landing gets glued together. I put holes into a wood strip to hold the rungs before attaching the rail to the top of it instead of putting them straight into the floor. I will just glue the rail in after painting. It has to bump up against the stairs to look right. I will just glue the curved end to the top of the stair railing.


Friday, April 10, 2015

The Entry Way Done!


The entry is done. It's the first room in the house so I wanted to finish it first. I tried to stay pretty true to the book on this room because I loved everything about it.

The first step to putting up the front door was to frame off the inside wall. All the wiring on that side of the house had to be done first because I encased it in the entry wall. The walls are painted a soft off white to give it a warm and welcoming look.


I lightly textured my entryway walls with vinyl spackling and I also did the front and large side wall in foamcore before I add them into the room. I had to bring out the large wall a little so my pre-made door frame will be flush with that side of the partition. This is the only pre-made door I'm going to use in the house. I like the hinge, but I don't like the chunkiness of the door frame.

Once the walls were up and dry, the floor went down and then the doors were attached. I worked on the staircase while everything else was drying.

All it needs now is a few pieces of furniture. 

Moving on to the second story where the hall is already coming together. Can't do the bathroom until the hall is done so the wall between them can go up. There's a lot to do in the hall.

Wednesday, April 8, 2015

Making Tiles


I love the tile floor of the entry way shown in the book. I could hardly believe it's made out of bristol board. It looks like real tile. I've cut out cereal box cardboard for my tiles and glued them to poster board. It's about the thickness I want.


Before cutting into strips, I paint the board the colors I want. I'm using Folk Art Vintage White acrylic paint and give it two to three coats over gesso until it's covered well. It only took one coat of the black to cover the card for the little accent tiles. I use grid lines to lay out my tiles, leaving a slight space between them.


I'm using vinyl spackling for my grout and just wiping it off with my finger and a slightly damp sponge. I've used matte mod podge as a sealer after the grout has dried overnight. After I glue the finished flooring to the dollhouse, I will give it a coat of liquid floor wax and buff it out.


It took several hours to make this one little floor but you can't get that handmade artsy look from pre-made flooring. I love it. It looks like real tile!


Sunday, April 5, 2015

Wiring the Dollhouse


Before I can put the walls up and do the upper floors, I need to bring the wiring down to the basement where they will all be plugged into a power strip that's attached to a transformer. 


Each room can be plugged or unplugged as needed. I am installing seven lights total. One for each bedroom (2), one in the hall, kitchen, living room, bathroom and a wall lamp for the second story landing hall. My light strip has twelve outlets.


I found out that most of my wire on my fixtures is not long enough to reach to the basement so each fixture will have to be spliced in the upper floors. I have to cut little grooves into the floor above each light fixture so my wiring will allow the floor to be flat. I will tape over them with masking tape.


I'm using little screw-in bulbs to pre-wired sockets for my lighting. They are really not as expensive as I thought. I got all my stuff in a 30% off sale at Hobby Lobby except for the transformer. I got that on Amazon because my store did not stock just the transformer by itself.


I want to make most of my light fixtures but I couldn't resist a little tulip light for the hall. I've spliced wires before so this is not hard if you just remember to twist the wires together and wrap them with shrink tube or electrical tape so they can't touch the other set of wires. I already have one side of the dollhouse wired and all the lights all work! YEAH! 


Friday, April 3, 2015

The Grand Staircase


The staircase is one of the things I couldn't wait to get started on. I also want to start on the flooring. I cut the rails out for the risers by enlarging the pattern in the book to the correct size and cutting out four thicknesses of cereal box card for them. I glued 2 thicknesses together for each side, then glued the risers to them before gluing the steps on.


The top rail for the rungs was made by drawing and cutting out the pattern from two thicknesses of cereal box cardboard then gluing them together. Then glue braid or cord on top of that. You could use bristol board instead of cardboard. I did not pierce the holes of the rungs into the rail. Instead, I just used glossy accents to glue them to the underside of the rail.

I ran a bead of glue to reinforce all the joints on the underside of the steps.


I cut the risers and steps out of balsa wood and shaped the bottom step riser out of card to wrap around on the end before attaching the rungs to the sides of the frame.


.


I reinforced the rungs on the underside of the steps and rail with glossy accents to hold them in place. I let everything dry thoroughly between coats of paint and glue before finishing with gesso then white paint except for the steps.


I stained and sanded the steps a little to simulate real wear. I glued a bead to the top of the first rail and painted it gold. I knew this staircase would be a little complicated so I wanted to tackle it and get it out of the way before I put my floor down and did the walls of the entry way. It looks fragile but it's surprisingly strong with all that glue and reinforcement underneath.