Saturday, March 31, 2018

A Dollhouse for My Dollhouse

Teeny tiny. This little doll house is tiny! It's for a doll's house. The base is 2-1/2" x 1-3/4" and it's only about 3" tall. Check out this video on YouTube by The Square to Spare. I took her idea and modified it to suit me. I used toothpicks for the railing. Everything else is cardboard since my hands are not as strong as they once were and it's really a pain to cut out wood with an exacto. The top story is basically a roof. I modified the porch, doorway and windows a little.


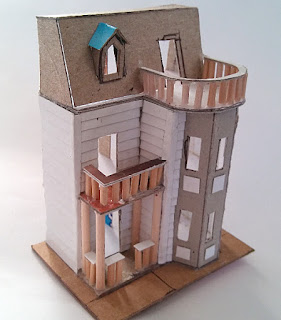
So I took her idea and tried to duplicate it in cardboard. I had some empty cereal box weight cardboard lying around (ok so I got a sweet tooth) and I also had some shiny thin card stock that I used for siding, although I might paint over it later.


This is just a start of a tiny really involved project. I put dividers in my rooms for additional strength and support.

I spent a whole day on this so far and didn't quit until 1 a.m. You could say I was focused.

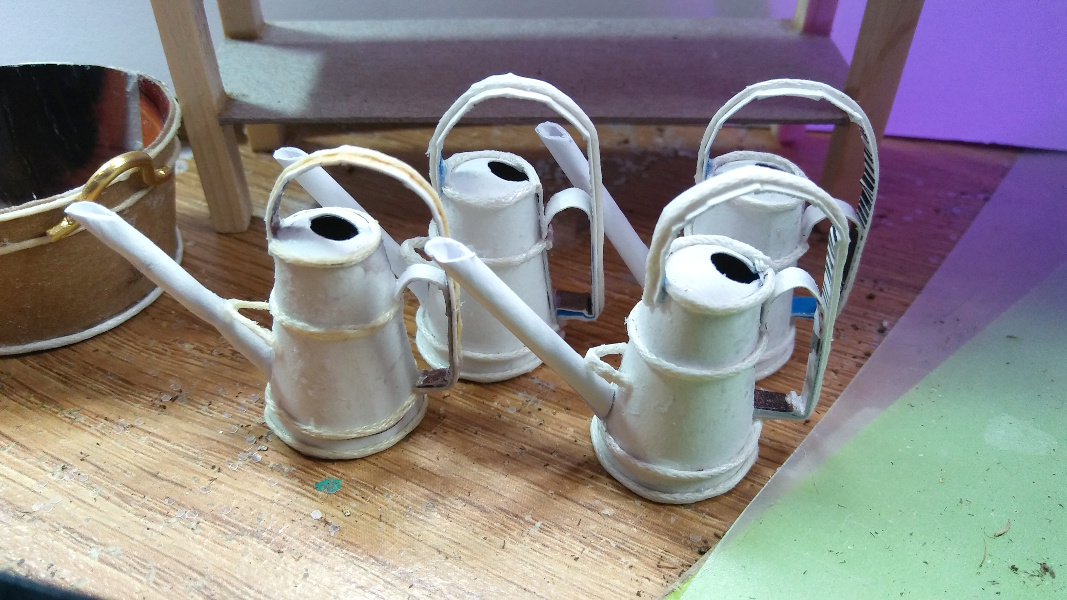
Yes, I plan to decorate it and make teeny tiny furniture for it too. This is just the start of it.


Tuesday, March 20, 2018

Making Little Containers

I've been making little containers. I can't decide if I want to make a garden scene or a wash day scene. I think I'll probably make both eventually but for now I'm just making containers to hold things for both.


It's a lengthy process to make flowers by themselves. Paper or polymer? I think polymer would be sturdier but paper is more translucent. Paper has its limits though. It's not waterproof and it does collect dust that can't be cleaned off. Paper fades... ok so I talked myself into polymer. I'll probably make some of both.


So, I needed flower pots and watering cans and flower tubs. I don't know if I'll do a garden scene or a flower shop scene but that will probably depend on how my flowers turn out.


I'm getting all these ideas off of YouTube and just going with them. Some of them I make up all myself like the wash tub and the laundry basket. I just cut out freehand what I needed from cardboard and just made them.


The laundry basket is made from weaving embroidery floss through cardboard of an oval sunburst basically. I drew it freehand and cut it out with scissors. Same with the tub. After making the flower pots, I just drew a bigger curve shape freehand and cut it out.

Next, I will be painting them all.


Friday, March 9, 2018

Wash Day

So while looking for inspiration for the next build, I ran across these instructions for a little old Maytag wringer washer. My Mom and my Grandma each used to have one. My Grandma still washed in hers until she moved in 1970.


I used to wonder why we didn't have a modern washer when I knew they made them. I saw them in the laundromats I would visit with friends. As it turns out, I come from some mighty frugal people. As long as something works, you don't get rid of it. That's just the way I grew up.


So that being a childhood memory for me, I wanted to make one. As it turned out, I had the pill bottles so I dumped out the expired aspirin in one of them and put the generic claritin into another bottle for the inside tub. The plastic bottles were easier to cut with my exacto knife than I thought they would be. Everything else I already had, or made from heavy card except for the electrical cord. I think the inside agitator of ours was black or gray, it wasn't red I'm pretty sure. I might repaint that. The old blue ones had a blue agitator from pictures but I've never seen a red agitator.


I had some soft wire for the drain hose so I just gutted it and replaced it with florist wire so I could bend a hook to imitate the hose end to fit over the sink. That is one thing I remember from my Mom's old washer. The water hose was stored in the tub and you hooked it to the kitchen faucet to fill the tub.

I did have to go get a soft thin cord for the electrical cord. I got a set of white ear buds at the Dollar Tree and cut the wiring apart into long single sections of cord. I colored it gray with an alcohol ink marker and draped it over the swing arm of the wringer. I had to make a little plug with some clay and wire. I have not glued my wringer to the swing arm so it rotates like a real one.


I followed the tutorial at Dollhouse Miniature Furniture and made substitutions and added my own little touches along the way. It's not perfect, I could have sanded it smoother but it's good enough for me and my childhood memories.