Showing posts with label Odds and Ends. Show all posts

Wednesday, October 23, 2019

Unicorn Update

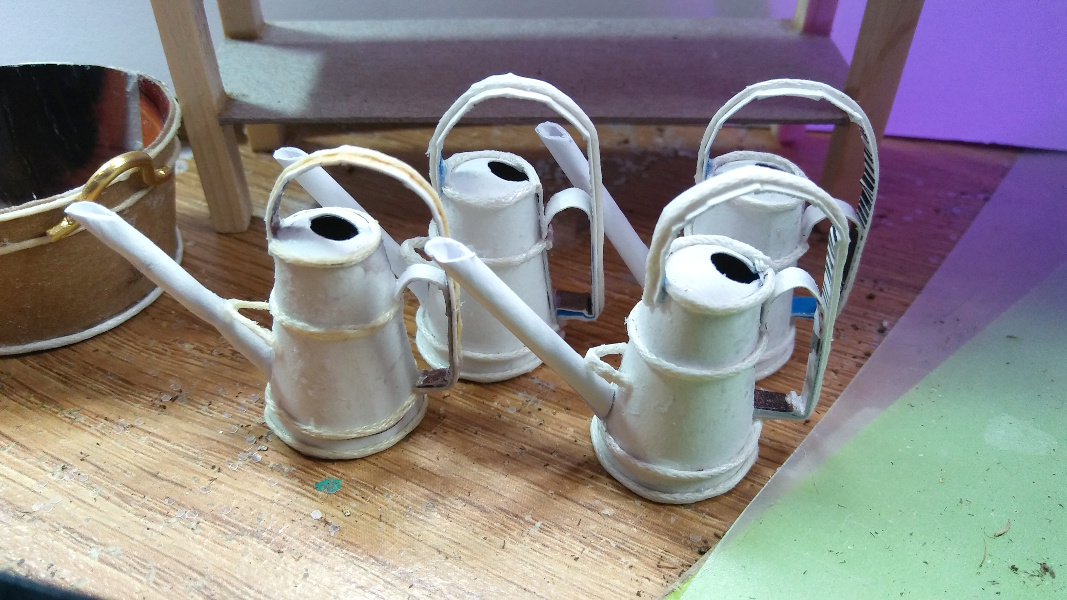
I have several irons in the fire right now. I like to stay busy. I'm already working on Christmas and I'm also doing several sculpts in between projects. I have all the layers on these two but as soon as I say that, I'll want to add more to a few areas before I paint.


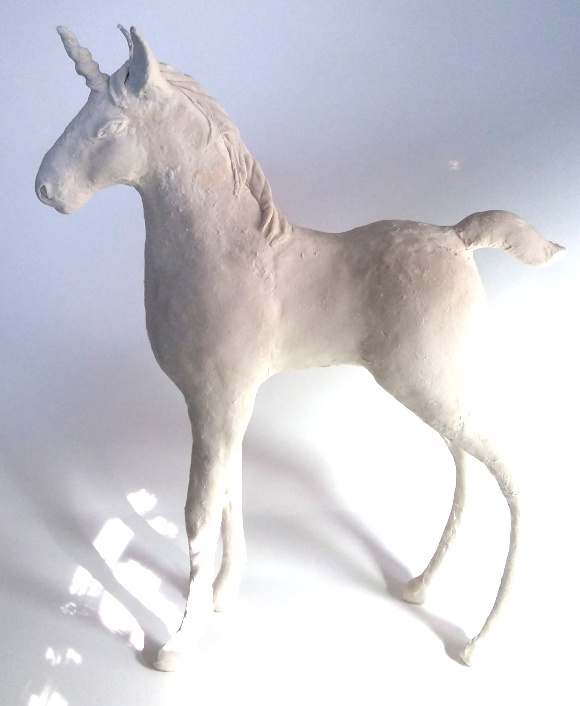
My unicorn is really shaping up. I still have to add the detail to his feet and give him a little more muscle definition before I'm happy.


The paper clay recipe I used is extremely hard when it dries. He accidentally got knocked over and only one crack on one leg. It was an easy fix.


I also made this little bunny. It was more fun to make because you can have a shape that resembles a bunny and you would have to mess up horribly for it not to be recognized as a bunny but with a horse, you pretty much have to be more exact to make it look right.


The fur hides a lot of mistakes. So I've got one more layer to the bunny for fur and then I can paint it. I like to let them dry for a few days in between layers to make sure they are good and dry. I also put them in front of a heater and turn them.


Wednesday, October 9, 2019

Baby Unicorn

Every now and then I like to sharpen my sculpting skills. I love to make animals and miniatures. I once sculpted a set of carousel animals using this method of paper clay over cardboard.  I also have recently learned how to make my own paper clay and it saves me a ton of money from buying the kind I used when I made dolls and carousel animals years ago - and it's just as strong, if not stronger.


I got the paper clay recipe from Jonni Good at Ultimate Paper Mache. It's been going around the internet for a few years with small changes to her original recipe but stick with hers because it is the best and the ORIGINAL one.

I got her instructions for making a baby unicorn and rabbit from patterns I purchased from her web site. I decided to make the unicorn first but I changed the instructions on mine because I've sculpted with all these materials before and pretty much know how I wanted to make mine.

I decided to use layers of corrugated cardboard with paper clay and not use aluminum foil and epoxy clay. I used what I had. I use foil under polymer clay but I don't like it under paper clay, I would rather build my sculpts up with cardboard for the thicknesses I need.


It's just a personal preference and you can do it any way you like. I followed the rest of her instructions pretty much though. I used florist's wire to reinforce the legs and neck. And I used a lot of hot glue to strengthen up these areas and hold the wire on to the cardboard. I added masking tape in places to help hold the next layer of paper clay on.


I built the thickest parts of the horse up over time and allowed it to dry thoroughly between layers. So far I have the start of a good looking little unicorn. He comes in around 12" tall to the tips of his ears. It's a start.


Friday, May 4, 2018

Tiny Dollhouse

I got the tiny doll's house dollhouse painted. I also finished the inside and decided to make a little couch for the living room.


The floors are just dry brushed with different shades of a brown acrylic wash and sealed with a satin gloss finish to look like wood.


This was probably the tiniest project I've worked on in a while but it convinced me to stick to 1:12 scale!


Tuesday, April 24, 2018

Painting Containers

Part of the fun of making little containers is finishing and painting them. It was hard to decide what colors to finish these with.


I really liked the galvanized metal look for the wash tub and flower containers but I liked a shiny metal paint look on most of the water cans.

I bought this little table at the Dollar Tree and just added a shelf to the bottom. Then I decided to make it a garden bench and paint it shabby.

The little flower pots turned out pretty good with a little white paint dragged on them for salt buildup and green paint to simulate algae.

Saturday, March 31, 2018

A Dollhouse for My Dollhouse

Teeny tiny. This little doll house is tiny! It's for a doll's house. The base is 2-1/2" x 1-3/4" and it's only about 3" tall. Check out this video on YouTube by The Square to Spare. I took her idea and modified it to suit me. I used toothpicks for the railing. Everything else is cardboard since my hands are not as strong as they once were and it's really a pain to cut out wood with an exacto. The top story is basically a roof. I modified the porch, doorway and windows a little.


So I took her idea and tried to duplicate it in cardboard. I had some empty cereal box weight cardboard lying around (ok so I got a sweet tooth) and I also had some shiny thin card stock that I used for siding, although I might paint over it later.


This is just a start of a tiny really involved project. I put dividers in my rooms for additional strength and support.

I spent a whole day on this so far and didn't quit until 1 a.m. You could say I was focused.

Yes, I plan to decorate it and make teeny tiny furniture for it too. This is just the start of it.


Tuesday, March 20, 2018

Making Little Containers

I've been making little containers. I can't decide if I want to make a garden scene or a wash day scene. I think I'll probably make both eventually but for now I'm just making containers to hold things for both.


It's a lengthy process to make flowers by themselves. Paper or polymer? I think polymer would be sturdier but paper is more translucent. Paper has its limits though. It's not waterproof and it does collect dust that can't be cleaned off. Paper fades... ok so I talked myself into polymer. I'll probably make some of both.


So, I needed flower pots and watering cans and flower tubs. I don't know if I'll do a garden scene or a flower shop scene but that will probably depend on how my flowers turn out.


I'm getting all these ideas off of YouTube and just going with them. Some of them I make up all myself like the wash tub and the laundry basket. I just cut out freehand what I needed from cardboard and just made them.


The laundry basket is made from weaving embroidery floss through cardboard of an oval sunburst basically. I drew it freehand and cut it out with scissors. Same with the tub. After making the flower pots, I just drew a bigger curve shape freehand and cut it out.

Next, I will be painting them all.


Friday, March 9, 2018

Wash Day

So while looking for inspiration for the next build, I ran across these instructions for a little old Maytag wringer washer. My Mom and my Grandma each used to have one. My Grandma still washed in hers until she moved in 1970.


I used to wonder why we didn't have a modern washer when I knew they made them. I saw them in the laundromats I would visit with friends. As it turns out, I come from some mighty frugal people. As long as something works, you don't get rid of it. That's just the way I grew up.


So that being a childhood memory for me, I wanted to make one. As it turned out, I had the pill bottles so I dumped out the expired aspirin in one of them and put the generic claritin into another bottle for the inside tub. The plastic bottles were easier to cut with my exacto knife than I thought they would be. Everything else I already had, or made from heavy card except for the electrical cord. I think the inside agitator of ours was black or gray, it wasn't red I'm pretty sure. I might repaint that. The old blue ones had a blue agitator from pictures but I've never seen a red agitator.


I had some soft wire for the drain hose so I just gutted it and replaced it with florist wire so I could bend a hook to imitate the hose end to fit over the sink. That is one thing I remember from my Mom's old washer. The water hose was stored in the tub and you hooked it to the kitchen faucet to fill the tub.

I did have to go get a soft thin cord for the electrical cord. I got a set of white ear buds at the Dollar Tree and cut the wiring apart into long single sections of cord. I colored it gray with an alcohol ink marker and draped it over the swing arm of the wringer. I had to make a little plug with some clay and wire. I have not glued my wringer to the swing arm so it rotates like a real one.


I followed the tutorial at Dollhouse Miniature Furniture and made substitutions and added my own little touches along the way. It's not perfect, I could have sanded it smoother but it's good enough for me and my childhood memories.


Wednesday, February 28, 2018

Faux Metal Bird Cages

I made one of these a while ago but thought I would make some more because I really like them. They are cute as a button.


I got the tutorial from Dollhouse Miniatures by Elizabeth . Start saving your empty little pill bottles now to use as a mold for the wires. Or you can also use your clay rollers as they are about the right size. You will just have to tape the wires down until dry.

You can make the top cap out of jewelry finding end caps or make some out of polymer clay or other beads. It's up to you. They're so stinkin cute I just love them. I've thought about putting a little bird in them for a dolls house decoration.


You can also use empty pill bottles as a base for making little baskets. I'll get into that maybe later. There is just so many pretty things to make.


Monday, January 22, 2018

I Made a Miniature Guitar

I know it's been a while since I posted on this blog but I'm still here. I've been wrapped up in my other interests (wish I could narrow it down a bit) but I'll be filling in this blog (I have a few) and updating it as needed. Once again I have the desire to make some miniatures.

I saw these being made on YouTube by several different people and thought I would give it a go. I think the best instructions were from The Square to Spare . I don't play any musical instruments and I'm not musically inclined, although I do like to hum. :) I do love the idea of making music and find musical instruments strangely beautiful.


So I knew when I saw these that I had to at least make one. So I already had some popsicle sticks (you might call them lolly sticks) and glue, thread, exacto knife and everything I needed EXCEPT the coffee stir sticks (for the sides) that bend so easily after being soaked in water overnight. Regular popsicle sticks will not do that I found. So I used heavy cardboard instead for the sides of the first one and it worked. I'll get some birch wood coffee sticks later.

I used paper clay as a wood patch to level out the sides and sanded all with an emery board. I followed the instructions as best I could and this is how mine turned out:


I used triple thick to glaze it with and no matter what I did, it still has tiny air bubbles. I probably should have used thinner coats and sanded in-between them but I have a life and didn't want to spend the rest of it on this one little guitar.

I like it and I'll probably make more after the blister heals and my wrist quits hurting. I didn't realize until later that I apparently had the death grip on it for precision.


P.S. I now have a box of 1000 coffee stirring sticks just for maybe one or two more guitars... this is how hoarding starts. I'm a craft supply hoarder. The irony is that I don't stir anything into my coffee. I drink it black. Better hang onto them. Who knows when I might need one again. Right?